Manage Accounts
The Manage Accounts screen serves as the main control panel for all the pledge and non-pledge giving accounts. All accounts have a set of common characteristics. And yet, each one contains its own unique settings for the purpose that it serves.
To access the Manage Accounts screen:
- Click Accounts & Pledges in the Button Bar at the top of the screen
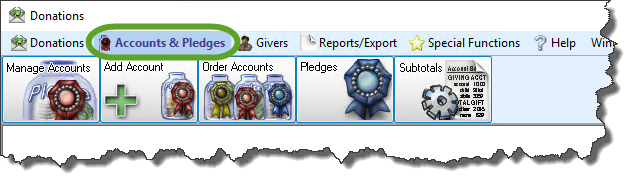
- Click the Manage Accounts button from the options that appear underneath.

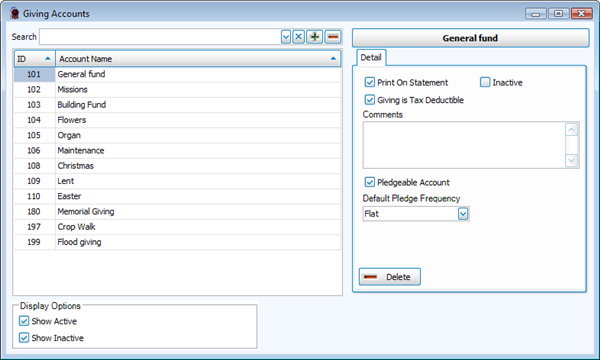
Use the Giving Accounts screen to perform any of the following tasks:
 Add an Account
Use the following instructions to add an account so that you can Enter Donations and Enter Pledges for the Givers that make donations and/or Pledges to your Church.
- Click Accounts & Pledges in the Button Bar at the top of the screen
- Click the Add Account button from the options that appear underneath.

- Enter the following information:
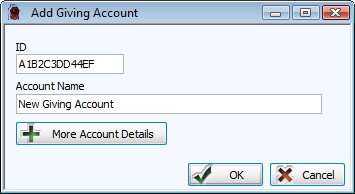
- In the ID box, choose any kind of number and/or letter combination of your preference in the software. You might find it helpful if your Church comes up with a numbering system for its accounts, so that it can organize them in a way of which it approves.
- In the Account Name box, enter the desired name for the new account.
- Click the More Account Details button.
- By default, the Print on statement and Pledge Account boxes will be checked for you. Make any desired changes to these or any other options in this area.
- Print on statement:
If you want the account to appear on Donation Statements for each Giver that will be making donations and/or pledges to it, make sure that a checkmark is placed in this box. - Inactive:
Place a check in this box to hide the account from the Enter Donations screen. You might find this useful if, for example, you set up the account at one point in time, but plan to use it at a later time. Or, you might find this useful if you have finished using the account and do not want further donations to be entered towards it. - Giving Is Tax Deductible:
If you or your Church have determined that the money that is being collected from donations is to appear as an amount that is tax deductible on the statement of the Giver, check this box. - Comments: (Optional)
Place any additional information about this account. For example, if you place information about the account you can have it available for reference and understanding at a later time. - Pledgeable Account:
If you want to make this account keep track of pledges, as well as giving, make sure that a checkmark is placed in this box. If you do not place a check in this box, the account will not appear on the Pledges screen. - Frequency:
If your Church has determined that anyone who makes a pledge to this account is required to make the pledge to make a donation at only one certain frequency, click the dropdown button and choose the desired frequency.
- Print on statement:
- When you are finished, click the OK button and the Add Giving Account screen will disappear.
- To verify that the account has been added, click Accounts & Pledges in the Button Bar at the top of the screen
- Click the Manage Accounts button from the options that appear underneath.
- Find the giving account that you added in the list of Giving Accounts on the left side of the screen and click it once to select it.
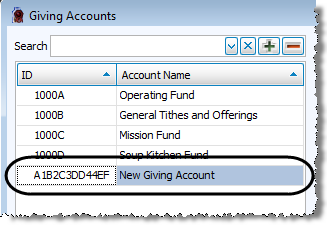
- Take a look at the right side of the screen to verify that the settings you made are correct. If you need to make any changes, you can make them now.
If you wish to add additional Giving Accounts, click the  Add button at the top of the list of Giving Accounts:
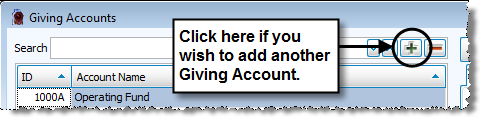
Then, in these instructions:
- Follow Steps 3 through 6.
- Skip Steps 7 and 8.
- Follow Steps 9 and 10.
When you are finished, click the X in the upper right corner of the Giving Accounts screen.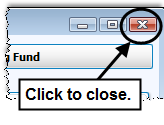
Change and/or View Giving Account
- Click Accounts & Pledges in the Button Bar at the top of the screen
- Click the Manage Accounts button from the options that appear underneath.
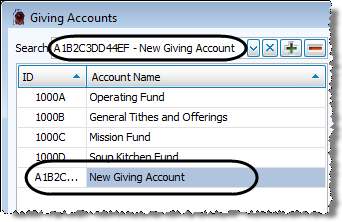
- In the Search box, type the name or number of the account whose information you need to change and press the ENTER key on the keyboard.
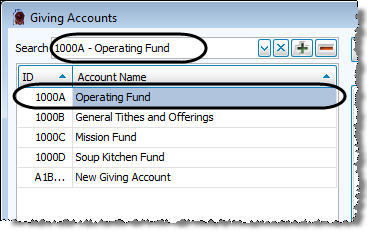
The full number and name of the account will appear in the Search box and will be selected in the list below.Note:
If you find it easier to scroll to the account, you can browse the list and click it when you find it. - With the desired account selected on the left side, look at the right side of the screen and make sure that it contains the same information as the selected account.
- On the right side of the screen, make any or all of the following selections:
- Print on statement:
If you want the account to appear on Donation Statements for each Giver that will be making donations and/or pledges to it, make sure that a checkmark is placed in this box. If you do not place a check in this box, the account will not appear on any statement. - Inactive:
Place a check in this box to hide the account from the Enter Donations screen. You might find this useful if, for example, you set up the account at one point in time, but plan to use it at a later time. Or, you might find this useful if you have finished using the account and do not want further donations to be entered towards it. - Comments:
Place any additional information about this account. For example, if you place information about the account you can have it available for reference and understanding at a later time. - Giving Is Tax Deductible:
If you or your Church have determined that the money that is being collected from donations is to appear as an amount that is tax deductible on the statement of the Giver, check this box. - Pledgeable Account:
If you want to make this account keep track of pledges, as well as giving, make sure that a checkmark is placed in this box. If you do not place a check in this box, the account will not appear on the Pledges screen. - Frequency:
If your Church has determined that anyone who makes a pledge to this account is required to make the pledge to make a donation at only one certain frequency, click the dropdown box and choose the desired frequency.
If you have any further changes you would like to make to any accounts in the Giving Accounts screen, repeat these instructions. When you are finished, click the X in the upper right corner of the Giving Accounts screen.
Delete a Giving Account
Use the following instructions to remove an account that you no longer need for donations and/or pledges to your Church.
- Click Accounts & Pledges in the Button Bar at the top of the screen
- Click the Manage Accounts button from the options that appear underneath.
- In the Search box, type the name or number of the account whose information you need to change and press the ENTER key on the keyboard.
The full number and name of the account will appear in the Search box and will be selected in the list below.Note:
If you find it easier to scroll to the account, you can browse the list and click it when you find it. - With the desired account selected on the left side, look at the right side of the screen and make sure that it contains the same information as the selected account.
- On the right side of the screen below the account name, a tab labeled Detail will display the current settings for the account.
- Click the Delete button at the bottom of the Detail tab.
If you have any further changes you would like to make to any accounts in the Giving Accounts screen, repeat these instructions. When you are finished, click the X in the upper right corner of the Giving Accounts screen.
